
Choosing the right Ceramic Insulation begins with understanding where heat, electricity, and mechanical stress will act. A material that performs well inside a kiln may fail around a vibrating engine. This guide explains how to compare ceramic fibers, rigid boards, tubes, coatings, and custom shapes. It focuses on thermal conductivity, service temperature, dielectric strength, compression resistance, and chemical stability. These details matter when a panel faces 1,000°C heat or repeated thermal cycling. They also affect installation time, maintenance, and total cost. Small differences become expensive later.
Reliable selection requires more than reading a supplier’s headline temperature. Check test methods, density, thickness, moisture behavior, and continuous-use limits. Ask for technical data sheets, safety information, batch traceability, and independent test evidence. Standards such as ASTM or IEC may help, but relevance depends on the product and application. An experienced engineer should inspect clearances, joints, fasteners, airflow, and possible contamination. A perfect laboratory result cannot guarantee field performance. Reality is rougher. I have seen insulation fail because a seam opened, not because the ceramic itself was weak. That lesson deserves attention. The following sections provide a practical framework for comparing suppliers, testing samples, and choosing Ceramic Insulation with confidence. They also question common assumptions, including “higher temperature rating means better protection.” It does not always. The best choice balances verified performance, installation conditions, service life, and responsible purchasing.
How to Choose the Best Ceramic Insulation?
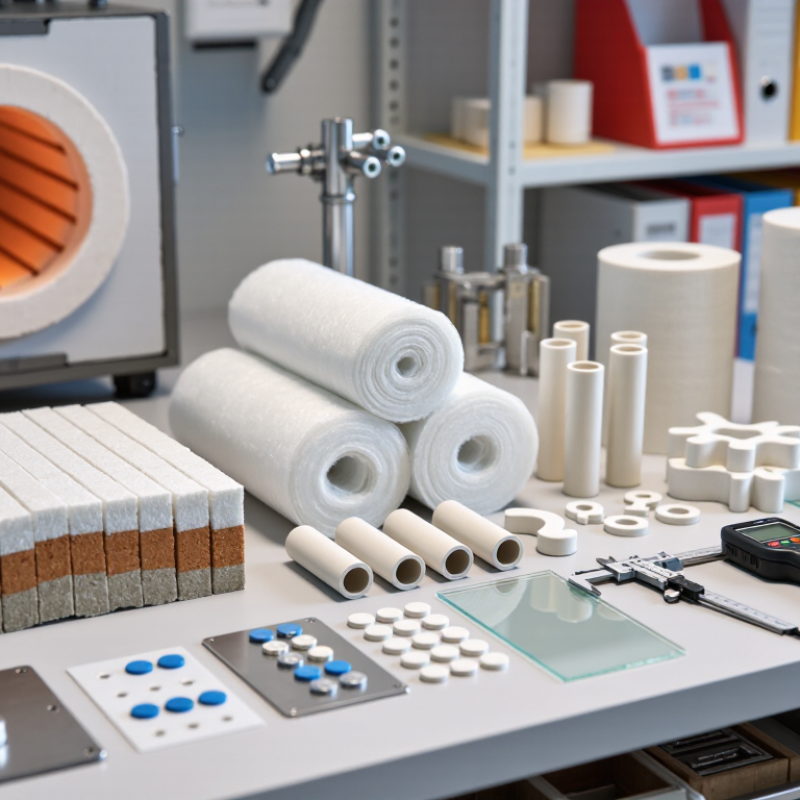
Ceramic insulation is not one single material. Ceramic fiber blankets are lightweight, flexible, and useful around curved surfaces or furnace doors. Their low thermal conductivity reduces heat loss, but compression can damage performance. Rigid ceramic boards provide better shape retention and resist airflow. They suit furnace walls, panels, and controlled gaps. Dense ceramic castables offer strength and impact resistance, although they store more heat and may need longer heating cycles.
Choose by temperature, mechanical load, moisture exposure, and installation space. Check the tested continuous-use temperature, not only the short-term maximum. A material rated for extreme heat may still fail when exposed to vibration or repeated thermal cycling. In practical inspections, poor joints often cause more heat loss than the insulation itself. That detail is easy to overlook. I would also compare thermal conductivity at the actual operating temperature, since laboratory values can appear unusually optimistic.
Tips: Measure the surface temperature first. Sketch every joint and opening. Select flexible fiber for movement, rigid board for stable walls, and castable material where impact is expected. Confirm density, shrinkage, and installation guidance through technical data sheets and recognized testing methods. Wear suitable protective equipment during cutting and fitting. One imperfect assumption can become an expensive repair.
Choosing ceramic insulation starts with the temperature profile, not the product catalog. Record normal, peak, and emergency temperatures at the actual surface. A kiln wall may reach 1,000°C during operation, while its outer shell should remain much cooler. Short heat spikes matter. So does cycling. Insulation that survives steady heat may crack after hundreds of starts and stops. Request test data at your operating temperature, not only the maximum rating.
Thermal requirements involve more than a low conductivity number. Measure available space, heat-loss limits, and contact conditions. A thin lining can save room, yet it may require tighter installation control. Check density, thickness tolerance, compression, and joint design. Small gaps around a pipe can create visible hot spots. I have seen drawings promise uniform coverage while field cuts left corners exposed. That mistake was easy to miss during commissioning. Infrared readings later revealed the weakness.
Environmental conditions also change the decision. Moisture, dust, vibration, chemical vapors, and airflow can alter performance. A porous ceramic material may need protection in a wet area. Ask whether binders, fibers, or surface coatings remain stable in service. Review handling procedures and worker exposure controls with qualified safety personnel. Also verify disposal requirements before installation. These details are often treated as secondary. They should not be. Recheck every assumption against measured conditions, because laboratory results may not represent a dirty, vibrating production line.
Choosing ceramic insulation starts with the operating temperature, not the product label. Alumina-silica fiber handles intense heat and offers low thermal mass, helping equipment heat up faster. Dense ceramic boards resist compression better, but they add weight and may slow heat-up. Calcium silicate can provide rigid support, although moisture exposure may reduce its performance.
Thickness changes heat loss, surface temperature, and available space. A 25-millimeter layer may suit a protected pipe, while a furnace wall often needs several layers. Do not assume thicker is always better. During one retrofit, an oversized layer interfered with a door seal and created a narrow hot gap. A thermal calculation would have exposed that problem earlier. Measure carefully. Check tested conductivity at the actual operating temperature.
Installation quality often decides whether the insulation performs as expected. Cut fiber blankets with a clean knife, stagger the joints, and avoid excessive compression. Boards need flat, stable support and tight joints without forced bending. Heat-resistant anchors should tolerate thermal cycling and avoid unnecessary thermal bridges. Wear suitable respiratory and skin protection during cutting. I inspect seams after the first heating cycle because small openings can appear as materials settle. Field judgment matters, but it should be checked against drawings, temperature records, and applicable safety standards.
Evaluating Safety, Durability, Cost, and Maintenance Needs
Choosing ceramic insulation starts with its safety profile, not its price. Check the rated service temperature, fire performance, and chemical stability. The material must suit the equipment and surrounding surfaces. Do not rely on appearance alone. Review technical data and independent test results before purchasing. During installation, control airborne fibers with suitable protective equipment and proper ventilation. Keep the work area clean. Follow local safety requirements and ask a qualified installer when access is difficult.
Durability depends on more than heat resistance. Thermal cycling, vibration, moisture, and compression can damage insulation over time. A ceramic blanket may perform well in a dry chamber but deteriorate near repeated condensation. Check for gaps, crushed sections, loose fibers, and surface discoloration. Small defects can increase heat loss quickly. I once assumed a thicker layer would solve every problem. It did not. Poor fitting created weak points around joints and access doors.
Cost should include installation, energy use, repairs, and replacement labor. A cheaper material may become expensive after frequent maintenance. Compare expected service life, not only the purchase invoice. Maintenance should be practical for the site. Plan visual inspections during scheduled shutdowns. Use a simple checklist and record temperature changes. Replace damaged sections promptly, but avoid unnecessary full replacement. Sometimes a localized repair is enough.
How to Choose the Best Ceramic Insulation?
Selecting the Best Ceramic Insulation for the Application
Choosing ceramic insulation starts with the application, not the product label. Define the operating temperature, heat exposure, pressure, vibration, and available space. A furnace lining needs different protection from a removable pipe cover. Conditions matter.
Check thermal conductivity across the actual temperature range. Some materials insulate well at room temperature but perform differently when heated. Density also affects heat storage, handling, and mechanical strength. Lightweight products reduce energy demand, while denser forms may resist impact better. Watch for shrinkage. Small gaps can become serious heat-loss paths.
I have found that installation details often decide field performance. Measure joints, bends, anchors, and access points before ordering material. Confirm chemical compatibility with fuels, vapors, and nearby surfaces. Review the technical data sheet, safety information, and relevant test methods. Do not rely on a single temperature rating.
Test a small section when the service is critical. Use operating conditions that resemble the real installation. Inspect the surface after heating and cooling cycles. I once treated easy cutting as a sign of quality, but the installed material later lacked enough strength. That judgment was incomplete. Ask about tensile strength, abrasion resistance, moisture behavior, and repair methods. A suitable ceramic insulation should match the full working environment, not just the highest temperature on a chart.
Start with operating temperature, heat exposure, pressure, vibration, and available space. The application matters more than the product label. Conditions matter.
Lightweight fiber reduces heat storage and can shorten equipment heat-up time. Dense boards resist compression and impact better. They also add weight.
No. Thickness affects heat loss, surface temperature, and available space. An oversized layer once blocked a door seal and created a narrow hot gap.
Use a thermal calculation and measure the installation carefully. Check conductivity at the real operating temperature. A 25-millimeter layer may suit a protected pipe, but furnace walls often need multiple layers.
Cut blankets with a clean knife and avoid excessive compression. Stagger the joints to reduce direct heat paths. Small gaps matter.
Boards need flat, stable support and tight joints. Do not force them around bends. Use suitable heat-resistant anchors with minimal thermal bridging.
Measure joints, bends, anchors, access points, and available clearance. Review thermal data, safety information, and test methods. Do not trust one temperature rating alone.
A trial section can reveal shrinkage, weak joints, moisture problems, or insufficient strength. Inspect it after heating and cooling cycles. Real conditions expose mistakes.
Wear respiratory and skin protection while cutting. Check chemical compatibility, abrasion resistance, tensile strength, moisture behavior, and repair methods. Easy cutting is not proof of quality. My earlier judgment was incomplete.
Choosing the best Ceramic Insulation begins with understanding the available types and their key properties, including thermal resistance, temperature capability, density, flexibility, and resistance to chemicals or moisture. The right choice depends on the application’s operating temperature, heat-loss targets, space limitations, and environmental conditions. A careful assessment of these requirements helps determine whether a lightweight fiber, rigid board, molded component, or another ceramic-based solution is most suitable.
Material performance should be compared alongside insulation thickness and installation methods, since proper fitting and protection can significantly affect efficiency and service life. Safety, durability, maintenance requirements, and total cost should also be evaluated rather than focusing only on the initial purchase price. The best Ceramic Insulation is ultimately the option that provides reliable thermal control, supports safe operation, withstands the working environment, and remains practical to install and maintain over time.
